|

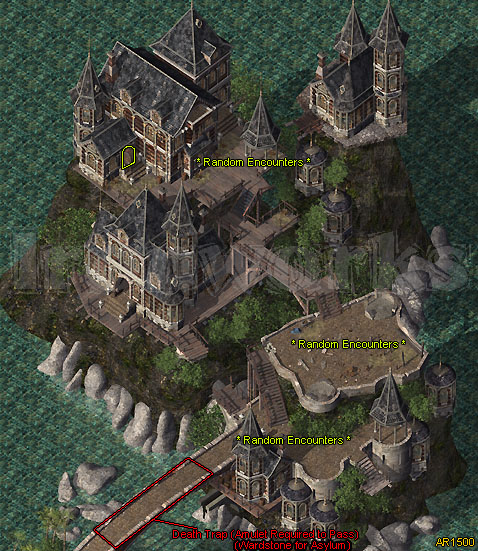
The
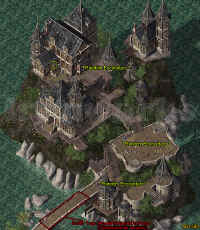
Town of Brynnlaw
First thing we
get to see what Irenicus has been up to all this time,
testing various things on Imoen (and that also explains why
Bodhi captured all those Shadow Thieves). Then you are taken
across the sea to the town of Brynnlaw, which is a stone's
throw away from the Asylum Spellhold.
If you followed the Shadow Thieves, then Sime will say that
she doesn't trust Saemon, your captain. He does seem
suspicious...
If you
followed Bodhi, then Bodhi will have Saemon show you around
town before vanishing into the night. Saemon tells you to
seek the tavern, before ending his tour. He isn't very
motivated.
FIND
INFORMATION
Once off the
Shadow Thieves ship, Saemon turns traitor and has some
Vampires attack you, before vanishing himself. Fight off the
three
vampires and Sime will talk to you. She recommends talking
to Sanik in
the tavern to discover an entrance to Spellhold.
If you got off
Bodhi's Ship, Saemon merely waits by his ship. He also
recommends talking to Sanik in the tavern to gain entrance
to Spellhold.
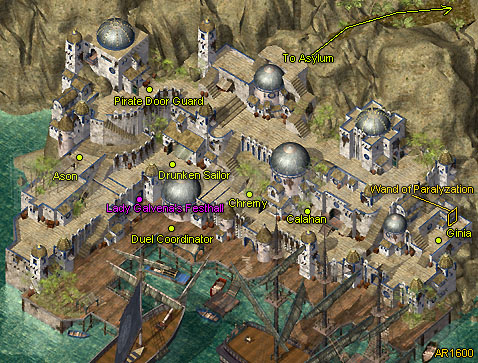
Head out to
the Vulgar Monkey Tavern. It is up one level (seeing as the
city is built on several terraced levels), about in the
center of the
map (x 2000 y 1550). You will find Sanik inside, he is
dressed as a
green mage. Talk with him. He begins telling you some stuff,
but is
quickly assassinated in the name of Guild mistress Galvena.
The innkeeper will then talk with you. He provides some details on the situation, telling you that Sanik's bride likely knows a way into Spellhold, but that she would be
currently held by Galvena. This would require getting into
the Guild, one way or the other.
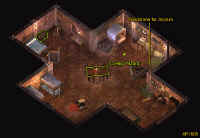
GALVENA'S
GUILD
We can now
enter the Guild (x 1080 y 1485) on the first level of town.
However, talk to one of the Courtesan's just outside the
guild and get
them to take you inside (which may require that you buy
their services for 100 gold). Once inside, tell the
courtesan that you are there to rescue Claire and they
should leave you alone.
Leave that
room. You are in the main hallway, go leftwards. Kill the
guards (one has a Halberd +2). Enter the room to the right
of the guards (x 345 y 195), and search the wardrove in the
back to find Galvena's Key.
Go back to the hall, and enter the last door.
Search the
jail until you find Galvena. Tell her that her evil ways are
over, then kill her. (4000 exp) She also has her mage,
Vadek, with her
(8000 exp) and they have some minor magical treasures.
PERTH
THE ADEPT
Talk to Claire
and she'll agree to take you to see Golin who may know
how to get into the Asylum. (10,000 exp) Golin thanks you
and will even give you 22 gold (2000 exp). He mentions that
only 2 types of people can enter Spellhold, Cowled Wizards
and Magical Deviants. There is one crazy Cowled Wizard
living in town, Perth the Adept who may have a way in. You
can also have the Pirate Captain throw you in there if you
prove to be unstable enough.
The best
option is to go find Perth and take his wardstone. You will
find Perth's house at the top of the city (x 3000 y 1200).
Perth is
apparently being Dominated by Irenicus as he wants to
"test your limits." Interestingly, Yoshimo tells
him that there will no testing with Yoshimo around, and
Perth calls that inconsequential. Hmmm...
Perth - 20,000
experience
Wardstone for the Asylum
Book of Infinite Spells
We can now go
to Spellhold (x 3500 y 2).
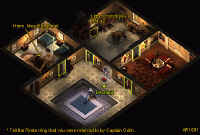
PIRATE
KING
Alternatively
you can go seek the Aid of the Pirate King. Head up to
the pirate king's house, and talk to his door guard (x 1115
y 665). Tell
him that Golin sent you and he'll open the door to the
house. You get
38,500 exp for convincing him that you are crazy. And there
is no reason that you can't get Perth's experience then have
the Pirate King commit you.
Trick: I
didn't see a little trick I found when asking the pirate
king
to commit you to Spellhold the game auto saves after your
party
receives the XP award. So if you load the auto save after
you
get into Spellhold, you can talk to him again and receive
the
XP award again. You can do this as many times as you want.
QUEST:
Liberate Ginia the Courtesan
Ginia -
Brynnlaw (AR 1600, x 3450 y 1700)
Chremy - Brynnlaw (AR 1600, x 1820 y 1450)
Calahan - Brynnlaw (AR 1600, x 1590 y 1740)
At the top
right of the city you will meet a woman named Ginia who
was recently forced into prostitution. Instead, she tries
begging
instead and says that she has done the deed. Ask her what
the
trouble is. You see, Chremy holds her brother captive, and
as long
as he does, she is forced to gather money for him. Agree to
help.
You will find
Chremy to the left of her. Talk to him. He doesn't
see reason (did you think that he would?), forcing you to
kill him.
Interestingly, he has Galvena's Medallion on him, which you
could
use to get into Galvena's Guildhall if you wanted. Now we
have to
smuggle Ginia out of town. Drop down another level and find
Calahan, the Smuggler.
Talk to
Calahan and ask him to get Ginia out of town. For 200 gold
he will smuggle them out to Ulgoth's Beard for you. (2000
exp)
Return to Ginia and tell her the good news (9000 exp).
QUEST:
Ason the Little Thief
Ason -
Brynnlaw (AR 1600, x 560 y 1170)
In the western
part of the city, a young boy will approach you and
swipe 10 gold off of you. He mentions that if he doesn't
steal
from you then someone will hit him. This is related to the
above
quest about Ginia (Ason is her brother).
OTHER: Pirates
This town is
crawling in Pirates. Some will attack you, others
will attack each other. None of them have any good
treasures.
OTHER: Priestess of Umberlee
Temple of Umberlee - Brynnlaw (AR 1600, x y )
Within
Brynnlaw there is a temple to the goddess Umberlee. Makes
sense as Umberlee rules the waves. Anyway, you can buy
several
interesting objects from her, like a Girdle of Bluntness,
but you
can also kill her for no loss of reputation and 14,000 exp.
Spellhold
As there are two ways into Spellhold, there are two places
you can end up. If you simply walked to the Asylum using
Perth's Wardstone, you must enter the Asylum on your own. In
that case you enter through the front doors. (x 625 y 1050)
If you asked
the Pirate King to have you committed you will find yourself
already inside one of the cell's in the Asylum. However, you
won't stay there long, as soon enough Irenicus teleports in.
You can talk to each of the inmates several times, and some
give you items (gems and worthless scrolls).
If Yoshimo is
in your party, he turns traitor. Turns out that he was
working for Irenicus the entire time. Not that he was
actually doing
anything to hamper your efforts, but still. Whether he was
in your party or not, the results are the same.
You are
drugged and put to sleep, when you awaken you are in the
tube...
THE (ALMOST) FINAL DREAM
Remember the three dreams that you had in
chapters 2 and 3? Well now is the time for the (near) Final
Dream, and this time you are given control. After listening
to Imoen we're on our way. First thing first, go through the
gate to enter the castle (this is the Dream Candlekeep, and
if you didn't play the first Baldur's Gate, Candlekeep is
where that game started).
You will find
a Demon barring your way. He wants you to make a sacrifice
to enter. What will you sacrifice?
Your mind -1
INT
Your Health -1 CON
Your agility -1 DEX
Your wits -1 WIS
Give up
whatever you can afford to give up (fighters should drop
Wisdom or Intelligence, mages Constitution, etc. Try not to
give up Dexterity whatever class you are). You lose whatever
you chose to lose, and can then enter the castle (x 2000 y
1500). Go to the back of this room to find the dream Imoen.
She tells you to "lead the beast here." Sounds
easy enough. Leave the castle.
Go left to
find Bhaal (about x 1000 y 1800). Talk to him and get him to
chase you. Now return to the castle, go in and go to Imoen.
Don't worry Bhaal will follow you. Imoen then says she will
make it vulnerable. Attack. Once defeated Bhaal gets
irritated.
SPOILER: The
Imoen in your dream is actually your own soul taken form to
help you out. This is why the dream ends with
"Imoen"
screaming... your soul has just been sucked out of you.
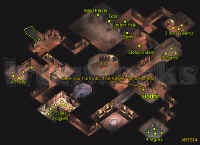
Maze Beneath Spellhold
(AR 1512)
Bodhi was given the task of killing you, and instead she
dumped you in a maze to play with you some more. She says
that she will give you time to escape and stop Irenicus from
his evil plans...
Also you can
pick up Imoen again (and you really should, she IS your
sister). I assume that Yoshimo turned traitor to make room
for Imoen to return to your party.
Due to the
nature of this maze, all the optional items (the riddles and
the portal) have been integrated into the walkthrough. This
is just for
convenience sake.
EXPLORE
THE MAZE
Ok, we are in
a big evil maze, and need to find the way out. Don't be
afraid to rest. Sure, Bodhi said you are on a clock but she
is an evil
vampire who can't be trusted. Go down the southwest passage,
kill
whatever is there (for me it was Umber Hulks and Minotaurs)
to find the big statue head (x 750 y 2100). He asks you to
find the Builder's Hand. Also you can search a pot near him
for some spells. Back to the
beginning.
There are now
three directions we can travel: Northeast, Northwest and
Southeast. (we've been southwest) Go up the northeast
passage first, (x 2170 y 1200). There is a door dead ahead,
open it. Kill the Clay Golem within. Then you can search for
treasure (trapped!):
Bag
of Holding (container that holds a lot)
Opal Stone (keep this, and don't put it in a container)
Rogue Stone (useful if you want to go in that one Bridge
door)
Spells - Prismatic Spray (Mage)
Arrows (etc.)
Go back to the
start, then go up the northwest passage (x 1300 y 1210) and
open the door to the right (x 1350 y 960). Kill whatever is
in here (Gibberlings). Search the 2 containers in here:
Ruby Stone
(don't put this in the gem bag, but keep it)
Spear +3 Magical Arrows (etc.)
RIDDLES
Head west to
the next room (x 760 y 1075) and go in. Welcome to the
riddle room! In the center is a chest full of bizarre riddle
objects.
These objects are then placed in the arms of the statue that
they solve the riddle for. Starting from just left of the
door and going around, the riddles are:
Riddle:
Answering Object:
At night I come without being fetched, at Star Medallion day I am gone without being stolen.
No beginning.
No end. I am a symbol of the Golden
Circlet world's cycles.
Two brothers
we are, great burdens we bear, Worn
Out Boots all day we are bitterly pressed; Yet this I will say - we
are full all the day, and empty when we go to rest.
Here, in this
place, you swallow me. Yet, were I Jar
of Water more, I could swallow you.
I have seen
the mountains rise. I have seen the fall of Netheril.
You shall die but still shall I march on: Sundial
To those
within the dungeon I am joy. To those
fully beneath my gaze, I can be Hell: Sun
Medallion
I will save
your life but yet can you die by me. I
will settle disputes yet not with words: Sword Medallion
Name me and so
shall you break me. Gagged Man
Always do I
tell the truth, yet cannot speak.
Look to me and see what really is: Mirror
I have two
heads but one body. The more I stand still, the faster
I run: Hourglass
Try to defeat
me but try in vain. When I win I end your pain: Grinning
Skull
Complete all
the riddles to get 20,000 experience. Then search the
center chest again to find:
Sapphire Stone
(don't put in gem bag, but do keep it)
Dusty Rose Ioun Stone Open the next
door (x 875 y 915), and then open the next door to the
right (x 1033 y 700). This is the second riddle room. Go up
and click
each of the faces twice to be teleported into the center.
There you will
be asked a riddle. Get it right and you are rewarded, get it
wrong and
you are punished. There are 12 faces and 12 corresponding
riddles:
Riddle:
Lighter than what I am made of, more of me is Ice hidden
than is seen, I am the bane of the mariner, a tooth within
the sea. Speak my name.
A spirited jig
it dances bright, banishing all Fire but darkest night. Give
it food and it will live; give it water and it will die.
The man who
invented it, doesn't want it for himself. A Coffin The man
who bought it, doesn't need it for himself. The man who
needs it, doesn't know it when he needs it.
The life I
lead is mere hours or less, I serve all my A Candle time by
being consumed. I am quickest when thin, slowest when fat,
and wind is the bane of the gift that I bring.
The more that
there is, the less that you see. Squint Darkness all you
wish when surrounded by me.
They come to
witness the night without being called, Stars a sailor's
guide and a poet's tears. They are lost to sight each day
without the hand of a thief.
They follow
and lead, but only as you pass. Dress Shadows yourself in
darkest black, and they are darker still. Always they flee
the light, though without the sun there would be none.
I have holes
throughout, from back to front and top A Sponge to bottom to
core. More nothing than something within, and yet I still
hold water.
I am free for
the taking through all of your life, Breath though given but
once at birth. I am less than nothing in weight, but will
fell the strongest of you if held.
Alive as you but without breath, as cold in my life as Fish
in my death; never a thirst though I always drink, dressed
in a mail but never a clink.
Of all your
possessions, I am the hardest to guard. If A Secret you have
me, you will want to share me. If you share me, you no
longer have me.
I can have no
color, though there may be darkness A Hole within. I have no
weight and hold nothing, and if placed in a container it
becomes all the lighter.
When all 12
riddles are answered, then everyone gets 5000 experience
points and you receive:
Ring of
Regeneration (regenerate 1 HP every 6 seconds)
THE
PORTAL
Go back to the
previous passage, and open the other door (x 750 y 800).
Fight the monsters in here (Rakshasa and Mephits). Past them
is a big portal. Remember those gems that we gathered that I
told you not to put in your gem bag? (Opal Stone, Sapphire
Stone and Ruby Stone) They are the key to this portal. Click
the portal once and a Greater Wolfwere appears, twice and a
Demon appears, three times and a Djinni appears and gives
you: Doomplate +3
(Plate Mail AC 0)
LEVEL
TWO (AR 1513)
We are done
here, so go back to the start, then take the southeast
passage to the next level (x 2100 y 1800).
We start in a
room. That is ordinary enough. Just ahead, the room
narrows quite suspiciously. When someone goes through that
narrow, a gate shuts and lots of Umber Hulks appear in this
room and the next. Which means that your party will probably
be split in two for this
battle. To avoid this fate, I sent out a Wizard Eye to scout
out the
area, it triggered the gate and left my entire party on one
side. You
can also have a thief pick the lock on the gate to open it.
Prepare
yourself for a big battle with a Lich. Wander down the
passage to the first door (x 2100 y 1800) and go in it. Here
you will find the aforementioned Lich and his undead buddies
(Greater Mummies and Skeletal Warriors). With Protective
Spells active, you shouldn't lose any people (or if you do,
you shouldn't lose too many). Keep the Liches defenses down
by Breaching, Piercing Magic, etc. Also make sure you have
good undead fighting weapons equipped (Daystar, Mace of
Disruption, etc.)
Liches are worth 22,000 experience. After the battle you can
search the pots here for some minor treasures (Cleric's
Staff +3, etc.).
Enter the room
right here, and search it for treasure. (spells and gold
mostly, as well as some arrows)
Head further
down the passage, it turns to the west. Follow it to the
door (x 1050 y 2070). Open it to find Dace, a vampire. This
ends in a
battle. Kill him and he retreats to his coffin. Then you
stake him to
get his Hand (the object we need to escape this place). If
you don't
have stakes, then when you go by the library again, he
reappears inside
and tells you that your job is half finished. You can find a
Stake
later on in this level when you get to the Kobold Shamans.
KOBOLDS
Back to the
main passage, then continue north to the next room.
(x 3000 y 1100) I found a Wandering Horror here to fight.
There are also 3 containers in here with spells (Simulacrum,
etc.) and other minor treasures. Open the next door.
In the middle
of this room (x 2340 y 515) you will find a book on a
pedestal. Click it twice to turn the page. Each time you do
this it
summons forth a "bloodthirsty" monster:
Kobold Captain
Sword Spider
Umber Hulk
Mind Flayer
Beholder
Treasures:
Ring of Free Action
Spells - Simulacrum
Summon Fiend
Search the
wall (x 2030 y 520) for a secret door, open it and go
through. This is the Kobold/Imp room. Past this is the
Crystal Room, which also has the Kobold Witch Doctor. More
Kobolds will appear around the Crystal, and summon forth its
"defenders" (more kobolds... and one xvart looking
guy). When they are dead, you get a Piece of the Crystal.
Go back to the
book room, open the door and go up the stairs.
THE
GIANT STATUE HEAD
Go now to the
southwest passage again to the big giant statue head. Talk
to it with both the Crystal from the Kobolds and the Hand
from Dace to get it to open the passage. For this everyone
gets 29,500 experience. The head doesn't physically move,
however you can now enter the door behind it. (x 470 y 1890)
FINAL LEVEL (AR 1514)
There are two
doors to the right, we want to take the bottom one (x 630 y
820). Open the secret door to the right (x 820 y 1020).
Inside is a switch, click twice to open the secret door to
the left (x 560 y 1020). Within here are a group of trolls
(including one 12,000 exp troll). Search the nearby pot to
find:
2 Mithril
Tokens (used later to gain an item)
Spell - Breach
Arrows +2
Back to the
passage, and take it down to the next door
(x 650 y 1500). There are Minotaurs (3000 exp) in here. Near
the door we came in is a pot:
2 Mithril
Tokens (so we have 4 total now)
Spell - Sunfire
Bolts +2
Gold
Open the door
at the top of the room (x 1000 y 1450) and go in. Search the
pool in the center of the room to find:
Minotaurs Horn
(used much later)
2 Mithril Tokens (6 total)
Mind Flayer Painting
There are 3
statues in this room, each of which has another
"monster"
painting. So click on each statue twice to get their
painting. They
WILL shoot spells at you, no matter what you do. Once you
have the 4 paintings, head back to the beginning room. Then
open the top door
(x 900 y 650), go through the passage and open that door
too.
THE
PAINTED DOORS
This leads to
a room full of monsters (for me it was Yuan-ti) that must
be dispatched before anything can be done. There are then
four doors in here, each with a picture of a monster on it
that corresponds with one of the paintings we got. From left
to right:
Mind Flayer -
11,000 experience
Flame of the North (2Hnd +2, 10% magic res., +4 vs Evil)
Spirit Troll - 8000 experience
Katana +2: Malakar (+2 AC vs. Slashing weapons)
Umber Hulk - 10,000 experience
Djinni - 10,000 experience
Bloodstone Amulet
The Umber Hulk
door leads to the next passage to go in. There were a
number of Wolfwere's in this passage. Go up and search the
pot
(x 2280 y 185):
Gems
Arrows (Bolts and Bullets)
Spell - Phantom Blade
Then enter the
room to the right. In this room you will find 3 Clay
Golems guarding the one treasure chest there. Funky. When
you take the items from the chest, the door slams shut and
the Clay Golems attack. Make sure you have Blunt weapons.
Then I would kill the Clay Golems first (Fake Talk works
fine) and then unlock and take the treasures:
4 Mithril
Tokens (10 total)
Gesen Bow String (final part of the powerful Gesen Bow)
Gem
Back into the
passage, now take the southern door (x 2025 y 515). I
found a Stone Golem in here. Search the table:
3 Mithril
Tokens (13 total)
Gold
Lots and lots of throwing darts and axes And also
search the pot to the left:
2 Mithril
Tokens (15 total)
Gems
Throwing Items
Spell - Maze
Open the next
door to the south to find the Vending Machine. This is the
reason we are collecting Mithril Tokens. Depending on how
many tokens are put in, you get a treasure:
5 Tokens -
Boots of the North (50% cold resistance)
10 Tokens - Boots of Grounding (50% electrical resistance)
15 Tokens - Boots of Speed (Haste permanently on user)
20 Tokens - Jester's Chain +4 (AC 1)
Right now you
should have 15 tokens. There are more than can be found
throughout the level. I found the Jester's Chain to be quite
useless, so I would get the Boots of Speed. Then later come
back and spend whatever tokens you have on the Boots of the
North. (If you plan to come back, you should probably mark
it on your map)
THE
ORB ROOM
Go back to the
beginning, then back down the bottom passage to the
Minotaur room. (x 933 y 1667) Open the door on the southeast
wall.
This passage leads to another door, which opens up to the
Orb Room.
There are 4 orbs in here that will cast a spell on whoever
is standing
on the mosaic in the center of the room. From left to right
the Orbs
cast:
Slow (x 1400 y
1575)
Heal (x 1500 y 1500)
Haste (x 1750 y 1525)
Lightning Bolt (x 1850 y 1600)
A great place
to Heal people, but the Haste Orb is probably more useful.
Head up the next passage.
BODHI
AND THE (VAMPIRE) SLAYER
Within the
next room is a giant Minotaur statue, some vampires, and,
oh, Bodhi. She has decided to kill you once and for all,
well before you
were supposed to meet (at least that is what I got out of
that
conversation). A battle breaks out, but quickly, the main
character
changes into the Slayer. This rightly freaks Bodhi out and
she flees
taking her vampire cronies with her.
Which leaves
you as the Slayer, and you aren't entirely in control of
your power. Keep everyone else in the party away from the
Slayer else they might get killed by it. Your party members
will rightly comment on this when you revert to normal. The
Slayer is the Avatar form (mortal form) of Bhaal and if you
are turning into Bhaal...
The next time
you rest after this, you turn in the Slayer again, and
chase someone in your party around (possibly the person you
are in a
romance with). You may even end out killing them.
The next time
you sleep after that, you MAY get the Slayer Dream, where
you gain the ability to change into the Slayer. The cost of
turning into the Slayer is a reputation loss of 2 points.
Also you cannot stay the Slayer for too long else you will
die. (It says "you feel yourself losing control"
when it gets close)
ESCAPE THE DUNGEON
Open the door
to your left (x 1965 y 1150). There will probably be a
Minotaur here to kill. Then search the pool near the door:
4 Mithril
Tokens (19 total)
Spell - Chain Lightning
If you go
further up this passage you will find a Gauth (small green
Beholder like creature, worth 9000 exp) and more Minotaurs.
No
treasure. Back to the Statue room.
Now take the
lower right passage. (x 2330 y 1425) This leads to a small
room with yet more Minotaurs. When they are dead, search the
pot to find:
Minotaur Horn
(used on the statue)
2 Mithril Tokens (21 total)
Spell - Limited Wish
Gold
Arrows
You now have
all the Mithril Tokens in the game, so you can go back to
the Vending Machine and get whatever you want from it.
Put the Horns
on the Minotaur Statue (everyone gets 29,500 experience) to
open the exit. Go out.
THE CHALLENGES
Oh, but we
aren't free yet! You will be in a small circular room with
6 enemies, goblins and hobgoblins for you to kill. Once they
are dead,
the Tester Apparition appears to administer the test to you.
These
tests have right and wrong answers, a right answer makes
your life
easier (sends you to an easier area) and a wrong answer
makes your life a little harder. I will document only the
easy path (although the hard path has nothing special in
it):
Agree to take
the test and you will be teleported to a small room with
a Spore Colony. Kill it.
Answer the
next question with 'Splinter,' and be teleported to a
room
with a table:
Cloak of
Reflection (reflects electrical damage back to source) Then talk to
the Apparitions around the table and answer their riddles:
Rich have need
of it, poor have it: Nothing
Runs as it wills: A River
Dwell with weak, rarely brave: Fear
Shines laughter or tears: Memory
Note: If you
messed up the 'table riddlers' last question (memory)
you will be teleported to a room with a machine. The correct
order of the machine is:
1. Mithril 2.
Ruby 3. Emerald 4. Sandalwood 5. Jade 6. Onyx
This will get
you a Bracers AC 5. (from Redd Barren)
This takes us
to the Troll room. Kill the three trolls you find and
take from one of them a Head. Go up and the Apparition will
appear and mention that this room isn't part of the test.
Tell him you'd like to
stay. Then put the Head in the Troll Altar. This gets you
the:
Bone Club +2,
+3 vs. Undead
Talk to the
Apparition to get out.
You will then
be judged. If you took the Easy Path (the one I just
described) then everyone in your party gets 51,250
experience points. If you took a harder path, then he
teleports in a Mind Flayer for you to fight. (Everyone then
gets 41,250 experience on the harder path)
There is one
thing of Minor Treasure (x 970 y 380), but nothing
important. Leave this area.
Escape
from Spellhold
Once you return to the Asylum, you will be met by Saemon
(the captain who brought you to Brynnlaw, if you forgot). He
offers you one sage bit of advice, get the deviant mages to
help you defeat Irenicus.
GAIN
ALLIES TO FIGHT IRENICUS
Avoid the big
room in the middle of this area for the moment, if you go
in there you WILL be destroyed by Irenicus (it's not even a
fight! He
just kills you!). There are some minor treasures in a
northern room
(x 1720 y 550). Open the door at (x 1400 y 400) and go up
the stairs.
You will
immediately meet up with Lonk the Sane. Convince him to free
the inmates (one way or another). Then convince the Inmates
that
Irenicus should be killed and they will teleport you into
his room
downstairs. Quickly a fight between you and him breaks out.
This battle is one of the larger battles in the game, as not
only do you have Irenicus to face, but soon he summons forth
a small army (of clones that look like your party) to help
him. Plus you have allies in the Deviants (so, if it says
"Wanev casts Death Spell on Mazzy", it means that
he is casting that on your evil clone). Defeat Irenicus and
everyone in your party gets 68,500 experience.
Irenicus
flees, leaving you to face another group of
"murderers".
(thieves mostly)
If Yoshimo
betrayed you, then he enters the scene after this and will
attack you. Kill him and take his heart. This heart will
allow you to
undo the Geas on Yoshimo and give him peace in death.
ESCAPE
FROM SPELLHOLD
Go back upstairs.
Follow the passage up and left to find Saemon again. He says
that he wants to help you and that he knows a way out. You
have three options here: one, trust him and go with him;
two, kill him; and three don't kill him and enter the portal
downstairs. Do the first one, trust him and he will teleport
you outside. He goes to town and tells you to follow. Don't,
re-enter the Asylum.
Note: If you
take the Portal you will skip the Sahuagin City (and its
wonderful treasures). No matter which you choose, you will
end
out in the Underdark eventually.
Enter
Irenicus' Office (x 1550 y 1000). There was a Stone Golem
here.
Search the dresser for: Staff
of Thunder and Lightning
Search the desk for: The Complete Journal of Jon Irenicus
(parts 1 and 2)
Go into the next room. Search the cabinet on the wall: Horn
of Silence
Then search
the drawers south of the bed for: Rogue Stone
Jon's Key (if you took the portal in the basement, this
would open the
secret door, but don't do that) - Leave
the Asylum and head back to Brynnlaw.
Escape
From Brynnlaw
Go to the
Vulgar Monkey Tavern and talk to Saemon again. His ship was
destroyed by the pirate lord (who probably had good reasons
for doing that). What he needs is for you to steal the
Pirate Horn for him so that you can steal one of the Pirate
Lord's ships. Without the horn you will not make it out of
the harbor. He offers you the Vorpal Blade in exchange for
doing this. You will find the Horn on the lord's mistress
Cayia at night.
Go to Cayia's
house (x 615 y 1475) at night, enter. After listening to
Cayia and her current lover's pillow talk, they call the
guards and flee.
Kill the pirates, then search her Table to find the Pirate
Horn (and
another Rogue Stone). Leave her house.
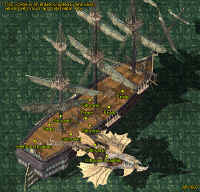
Head over to
the Pirate Ship (x 1700 y 1900) where a group of pirates
will attempt to enslave you as a rower. Disabuse them of
that notion. Continue
east to find Saemon (x 2950 y 2500), and talk to him. This
gets you aboard the ship, but soon the Pirate Lord tracks
you down. There is a bit of a scene, and Deshark, the Pirate
Lord, even kills his own mistress, Cayia. Saemon, ever
courageous asks you to kill Deshark for him.
Kill the pirates and Saemon rewards you with a Silver
Blade
(part of the Vorpal Sword!)
The ship casts
off...
The
Githyanki Incursion
Soon the ship
is overrun by Giths looking for their sacred Blade.
Although Saemon tries to get a non-violent solution to this,
it isn't
meant to be and a battle soon breaks out. You have a very
brief window to kill Saemon, if you want (18,000
experience). Soon this battle is forced to a conclusion when
the Sahuagin capsize the ship sending everyone overboard...
|